|
This is a JAR with all the source, Ant files, etc. This example will build if you have tools installed, and a virtual P drive per the java tools instructions here
20070713 fixed some build file issues |
Compile a simple program using Eclipse
-
or -
your favorite IDE or command line |
- Create an Eclipse project, or open the one in the JAR.
- Select the project and right click, then select Properties and choose the Java Build Path
- Source should include the /src subfolder
- Projects required in the build path: none
- Libraries: Systronix Utils, and the aJile runtime classes.jar and RTS.jar (no RTS.jar? go back to the aJile upgrade instructions) . For each of these use Eclipse variables, such as JAVA_LIB, and aJILE_HOME, respectively, and "extend" them with a reference to the respective jar files. It will look similar to this screen shot . This should also include the CLDC_HOME variable (screenshot) which gets extended (screenshot) to reach the CLDC classes.jar file (screenshot)
- Send the output files to a \classes subfolder
- If you have an old project with 3.16.09 output, purge it to avoid confusing the tools and yourself.
- Build the project. You should now have a .class file in the \classes folder
|
Use JemBuilder to Link your program |
Open the provided JemBuilder .ajp project. JemBuilder (get the version with F1 or Help->About) has changed a lot, so familiarize yourself with at least these settings:
JemBuilder 5.0 Top Navbar Settings
Project -> Properties |
You need an "Embedded Runtime" (screenshot) plus a "Target Configuration" (screenshot). The Target is selected from a list (JStampPlusRamConfiguration in this example) but you must create the Embedded Runtime definition (just once). Copy the values shown in the screenshot. You can create your own Runtime definition by editting the fields or using the wizard in Tools->New Runtime
Note that the Embedded Runtime is rather involved and requires new installation files from 3.16.09 - e.g, the Sun ME CLDC 1.1 Reference Implementation. |
Project -> Drivers |
We want com1 and com2 (screenshot) |
Tools -> Libraries |
Create a library reference for Systronix Utils (screenshot) |
JemBuilder 5.0 Left Pane Settings
Project -> Output Files |
I like to put output in folders specific to a given target and build such as
P:\hardware\boards\JStamp\SerialEcho\rambuild
(screenshot) |
Project -> Pin Setup 2 |
Port D - check the first two boxes to allocate Port D[0145] to UART usage. Here you see that Uart0 and Uart1 correspond to Java com1 and com2 (screenshot). |
Project -> Memory
Code Segment Location |
RAM should be selected and the only option since we are doing a RAM build. It seems that when selecting a Flash configuration, the Flash Code Segment Location is not automatically selected. Watch out for this and check it on each JemBuilder project you create! |
JVM0 -> Main |
com.systronix.example.SerialEcho |
JVM0 -> Classes |
Add Systronix Utils from Available Libraries to the Libraries. In the current release these arrows are backwards so press the "remove" arrow to add it and vice-versa. |
JVM0->Memory->Standard |
Leave the default Garbage Collection at Mark and Sweep. Other algorithms are not fully implemented yet. |
JVM0 -> Drivers |
com1 and com2 are selected in our example, with neither getting System.out (boxes not checked) |
Now run JemBuilder and you should get a clean build. Of course I always have a couple of errors to fix, usually path typos or missing libraries.
Look in the ...SerialEcho\rambuild folder and you should see files like JVM0.map, and build_program.bin which is the executable binary file (formerly named build.bin in 3.16.09) |
Download and run with Charade |
- Set your target jumpers for RAM execution, connect a JTAG adapter from the PC to your target, and power up the target
- You should see a green JTAG adapter power LED
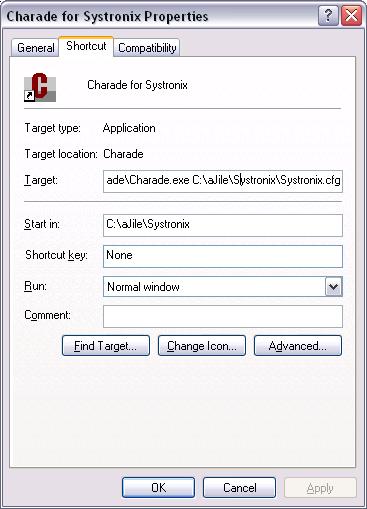
- Use the start-> programs -> aJile -> Charade for Systronix shortcut you made during installation
- To invoke Charade, use the shortcut in the C:\aJile\Systronix
folder, which you can copy to your desktop or task
bar. This starts Charade in the C:\aJile\Systronix folder
and uses the Systronix configurations, and Systronix versions
of Charade.wcf and Charade.cfg. This includes things like
a Charade "verify" button, and a Charade Device
menu listing of all Systronix platforms. If you right-click
on the shortcut and select "proprties" you should
see a dialog box like this
one.
- Choose the Charade taskbar Device -> JStamp
- on the Charade taskbar, select File->Execute and browse to the load.sod file within the rambuild output folder you created with JemBuilder
- OR - copy the file path to the binary output folder from the JemBuilder output screen, such as "P:\hardware\boards\JStamp\SerialEcho\rambuild", then in the charade console command line enter "cd" (Change Dir, just like the old DOS commands, in fact this IS using a DOS command) followed by the path, so "cd P:\hardware\boards\JStamp\SerialEcho\rambuild". then poress enter. Now you can just press the Charade load button to load build_program.bin. This is my preferred approach.
- The file should start loading
- At least this once, do a verify. Click on the verify button, or use the command line " verify build_program.bin". You cannot use the old "build.bin" file name from 3.16.09. Your charade.wcf file must have the new file name. Go back to the 4.X upgrade instructions if you need to. If the verify fails you either have the wrong device selection, the wrong memory JemBuilder and hardware jumper settings (flash vs RAM execution), or you are not verifying against the same file you loaded.
- Now connect a serial port to com1 of the target and a PC. Open a comm program such as Hyperterminal at 115200 baud, 8/N/1, no flow control.
- Click RUN in Charade and the console should show:
-> sw tx on
Textio mode (tx): on
-> run
vm.0 charadeIO active
[TEXTIO.0]->Serial Port Example bab 1.2 2007 July 11
and the terminal window should echo what you type. So if we type "ASDF" on the PC, the terminal should show ASDF and Charade's console:
[TEXTIO.0]->0x41 A
[TEXTIO.0]->0x53 S
[TEXTIO.0]->0x44 D
[TEXTIO.0]->0x46 F
|
| Problems? |
Yeah, me too. Here is some debugging help. |
| Important Notes: |
- You MUST have the latest Systronix configurations for this example to work.
- JStik use is similar, just select JStik RAM in JemBuilder and Charade. The JemBuilder Runtime setup is the same.
- Flash use is similar - just select a JemBuilder Flash configuration and create a flashbuild output folder. Be sure to select the "Flash - used for deployment..." Code Segment Location option in the left pane Project->Memory page. It seems odd/wrong to me that this isn't automatically selected by a Flash configuration. Set your target jumper for flash boot, and use Charade to execute that flashbuild\load.sod file.
|