
| New January 12, 2001 - Tutorials are moving |
| All the tutorials are
now at http://www.systronix.com/tutor/top.htm (These old pages will be left for a while until all the new tutorials are complete) |
JBuilder Project Paths
paths? what paths? jars? packages? logic?
or: The Blind Lead the Blind Down the Primrose Path

In the course of using JBuilder it seemed
      logical to me to set up a file structure, with input and output
      folders and tell JBuilder to use those paths. Surprise! It doesn't
      work, at least in my experience with Windows NT and 98. Here's
      a step by step approach to what does work followed by one of
      many examples of what doesn't. Most of this has nothing to do
      with TINI or TiniTools.
Where JBuilder wants to put its projects:Since Java from the beginning was intended to support dynamic module loading over the internet, it includes provisions for avoiding name space conflicts. Java has no "global" variables, functions or procedures. Java makes some assumptions about paths, especially Java packages. JBuilder has two places to set paths - Default Project Properties, and the properties of the current project. In addition, you specify "Required Libraries" which gives you a way to point to required packages such as tiniclasses.jar and tini.jar (more about these in a moment). I spent far too much time in a state of puzzlement, groping through JB's help and tutorials, not to mention trying every possibility. My conclusion is that JB does not automatically create the paths you will probably want in the Windows operating systems. (It certainly won't create the path structure I would like). You have to do some of the work yourself, manually. The problem is that JBuilder wants to make all your project files part of a /user folder in the operating system main folder. For NT, that means: C:\WINNT\Profiles\bab\jbproject\untitled1\untitled1.jpr Where I want JBuilder to keep my projects:Maybe you want all your JBuilder projects in such a place, if so, go ahead. This doesn't work for me, and probably not for most developers. I have a separate logical drive on my local disk for code development and I want my 'private' JBuilder projects there. We also maintain 'public' projects (meant to be shared by others within Systronix), and those projects are organized on our company file server. |
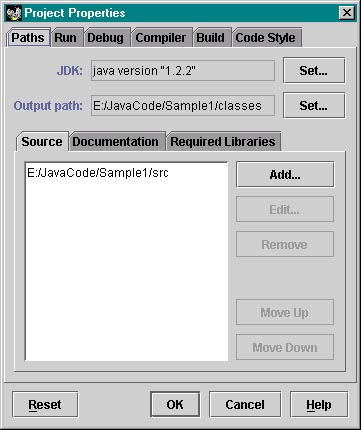
| This portion of the path called the "Source Path" above is not at all what I want. I recommend changing it to {drive_letter}:/java_code_folder/project_folder, but doing so at the new project wizard path dialog. |
| What about the output path? It wants to be a subfolder of /myproject called 'classes': |
| So what help is all this help? Not much really, since it's all based on a faulty premise, that we want our projects in the operating system folder. I included it here so that you can see the (not at all obvious) answer to the (very obvious) question - "well, did you check the online help"? Yes, I did. |
How Java wants to organize packages:To avoid namespace conflicts, Java uses 'packages'. Packages are simply collections of classes. Every class you write can be part of an explicit package which you name, or part of a default package if you don't create a package name. For simple example and practice programs, you don't really have to create packages, if you are not intending to distribute your code. Packages intended for distribution should use the writer's Internet domain name, reversed, to create a unique package path. For example if Systronix were to distribute a CANBus class, it could be: com.systronix.tini.can.canbus. Java would look for the class "canbus.class" in the folder path: com/systronix/tini/can/canbus.class. This way, every other TINI user could write and distribute their own "canbus" class and they could never be confused since only one company in the world can have the domain name systronix.com. And in fact, Dallas distributes TINI classes in packages in just this fashion - for example, "tiniclasses.jar". |
Jar Files:Jar is an acronym for "java archive". Jar files are simply a collection of classes, images, html pages, and any other files which you want to distribute together. They are similar in concept to the ubiquitous ".zip" files which are widely used to compress and distribute files on the Internet. JBuilder's jdk1.2.2/bin folder includes a jar utility. If it is in your path (and it will be if you followed the previous installation instructions) you can invoke jar on the file tiniclasses.jar file and see what it contains. If you type "jar" with no other arguments you will get some help which explains that the "-tvf" switches mean to generate a verbose table of contents for the filename which follows: E:\tinibeta2.2>jar -tvf tiniclasses.jar Try this yourself now. Be careful what you type. The jar utility is capable of modifying the tiniclasses file, something you don't want to do right now. Keep a backup copy just in case. |
Contents of tiniclasses.jar:E:\tinibeta2.2>jar -tvf tiniclasses.jar E:\tinibeta2.2>jar
-tvf tiniclasses.jar This is a partial listing of the contents of tiniclasses.jar, and you can see the class "CanBus" is in the path com/dalsemi/comm/CanBus.class. |
Jars, packages, and import:In tiniclasses.jar, the class "CanBus" is in the path com/dalsemi/comm/CanBus.class. In our program if we wanted to use this class, and the tiniclasses.jar file was in our classpath (as a Required Library in JBuilder), we could refer to the class using its fully qualified pathname: com.dalsemi.comm.CanBus, but this is a lot of typing. To save some typinng and make source code less cluttered, you can 'import' the entire com/dalsemi/comm package using the "import" statement in your program. (In a java program, imports must occur after any package statement and before any class definitions.) Import is used in the java program examples which follow. import com.dalsemi.comm.* Import doesn't copy, load, or paste the whole package into your java program, it just makes it accessible to your use. With the import statement above in a java program, you can then refer to any of the comm classes, such as CanBus by their simple class names. If this sounds a little confusing, don't worry about it now, the examples should clear things up. |
One JBuilder Approach Which Works
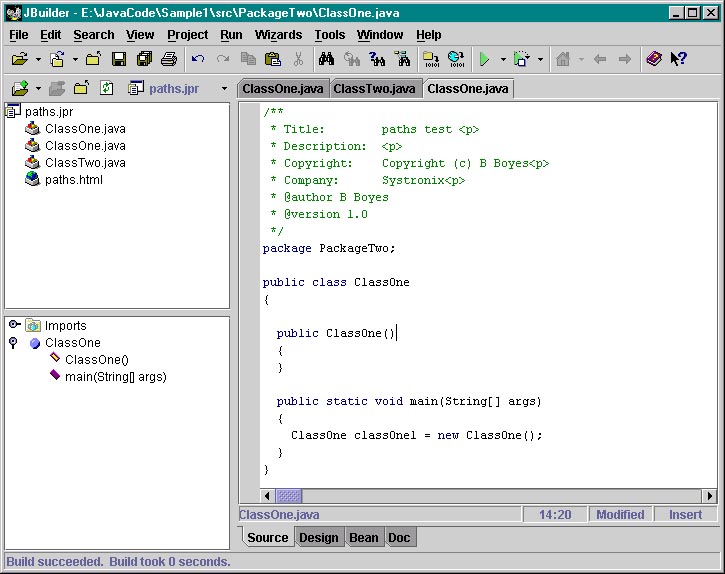
No default paths, manually typed prj pathI created a folder e:/JavaCode/ with the intent of subfolders for each sample program, i.e., e:/JavaCode/Sample1, e:/JavaCode/Sample2, etc. There was no default project source path. At the JB New Project Wizard, I manually typed in the path, even though the folders did not exist at the time. JBuilder went ahead and created the folders (without asking for acknowledgement, as most windows apps would). Paths.jpr got created in the JavaCode/Sample1 folder as hoped. Now I created a new class 'ClassOne' in package 'PackageOne'. Interestingly, JBuilder created subfolders "src" and "classes" for the project source and output folders, respectively. |
| Note that the actual java and class files are located in the project package folder. A project can contain several packges. This is a very usable structure and is what I wanted, so I recommend this approach as one which works. |
Adding another class in the same package,
and a class with a new package

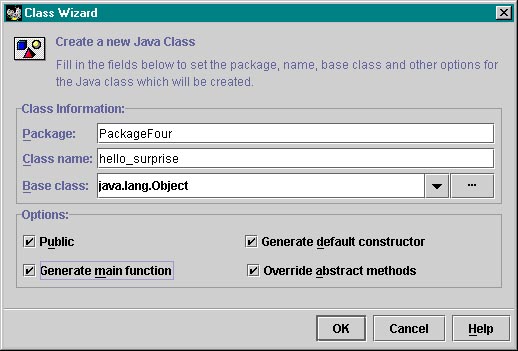
| Above is the new class wizard for a new class in the same package, and below for a new class in a new package. |

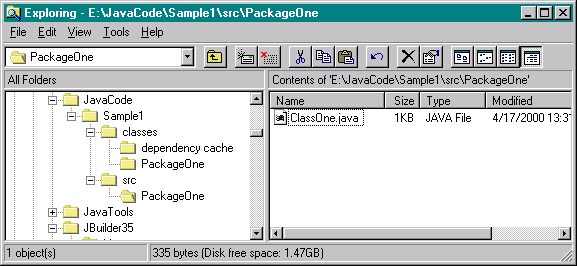
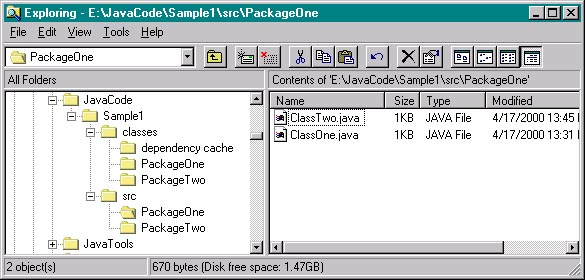
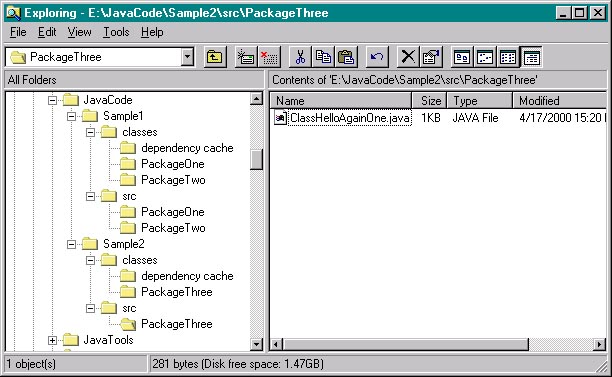
| Here's the result, after a build, both in JBuilder and Explorer. |
Adding another project folder (with new projects and classes)
to the same parent folder
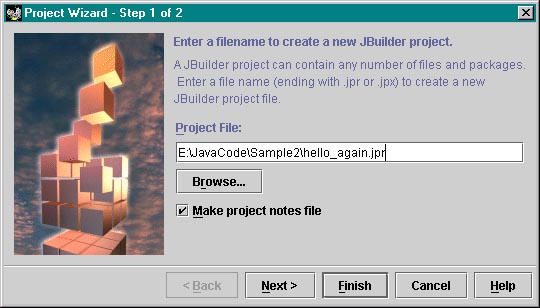
| One more thing to test is adding another new project in the same main JavaCode folder, browsing to it in the new project wizard. Close the current projec and start a new one. All I can browse to is the JavaCode folder, and then type in the new project folder - Sample2 - and the project name which I will call "hello_again.jpr" |

| Now I'll create a new class in a new package in this new project: |
| Here's the result in Explorer. Looks OK. |
| I've experimented with various settings of the Default Project Source Paths and invariably JBuilder does not do what I want it to. The above scheme is the only one which works consistently. There may be others, email me if you learn something interesting. |
An approach which won't work
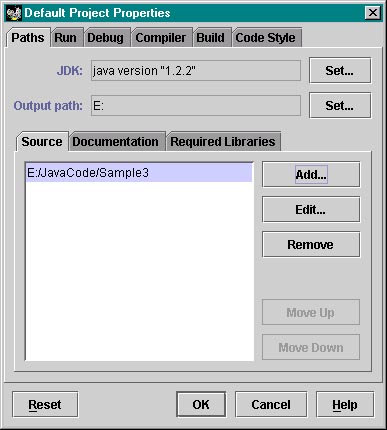
| Here's an example of the dark side of JBuilder's paths, in which seemingly obvious choices lead to a surprising outcome. (At least for me.) For example, in Explorer create e:/JavaCode/Sample3 and make it the default project source path. |
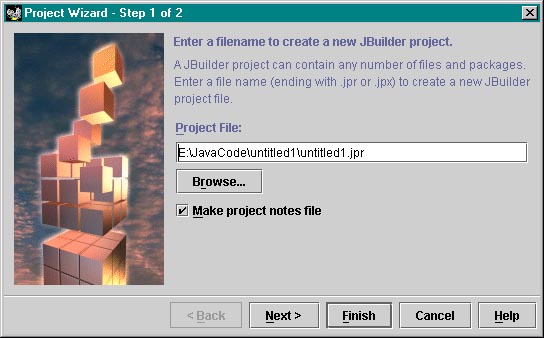
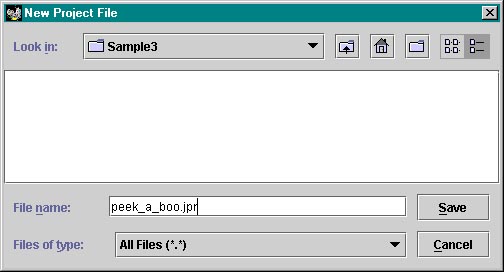
| Now create a new project. Hmm - JBuilder skips the /Sample3 folder, which was where we wanted the .jpr file to go, so we'll browse to it and create a new project peek_a_boo.jpr |
| So far so good, now create a new class in a package, the way we did previously. |
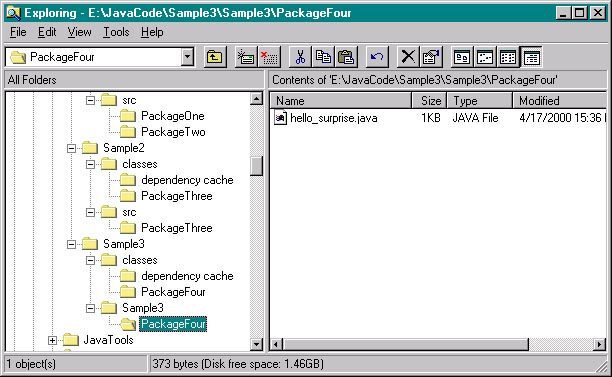
| Save and build the new project and see what we have in Explorer. Whoa what? JBuilder created a second /Sample3 folder and put our source there, not in a /src folder. There's a little bit of logic to this since we DID set the source path to d:/JavaCode/Sample3, but that's not what we got - the source is now in d:/JavaCode/Sample3/Sample3?? Oh well... |
|
|
|
|