

| New January 12, 2001 - Tutorials are moving |
| All the tutorials are
now at http://www.systronix.com/tutor/top.htm (These old pages will be left for a while until all the new tutorials are complete) |
| This section of the tutorial starts a simple hello world program and expands on it in the following lesson. Although simple, the program illustrates using the Java main() method, creating a Java class, and creating and using a class method. The program is tested on both the PC and TINI. |
| Create a new project (File->New Project), a new project wizard will open. Browse to the JavaCode folder you created earlier, type in a subfolder tutorial1 and call the project "hello.jpr". |
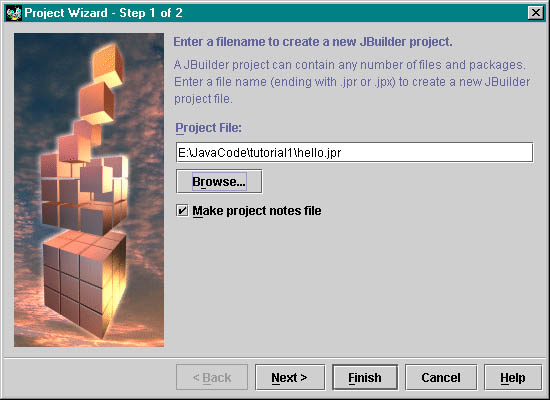
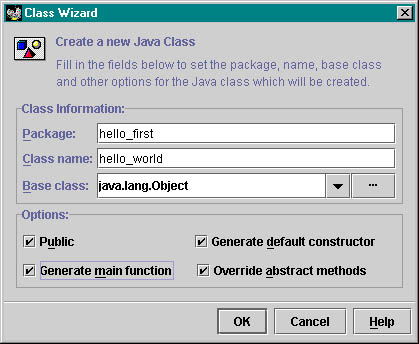
| Click 'next', fill in any additional information you desire and then click 'finish'. Now we need a new class. Use the JBuilder File->New Class pulldown and the class wizard will open. Call the package hello_first, the class hello_world, and check all the options. Click OK. |
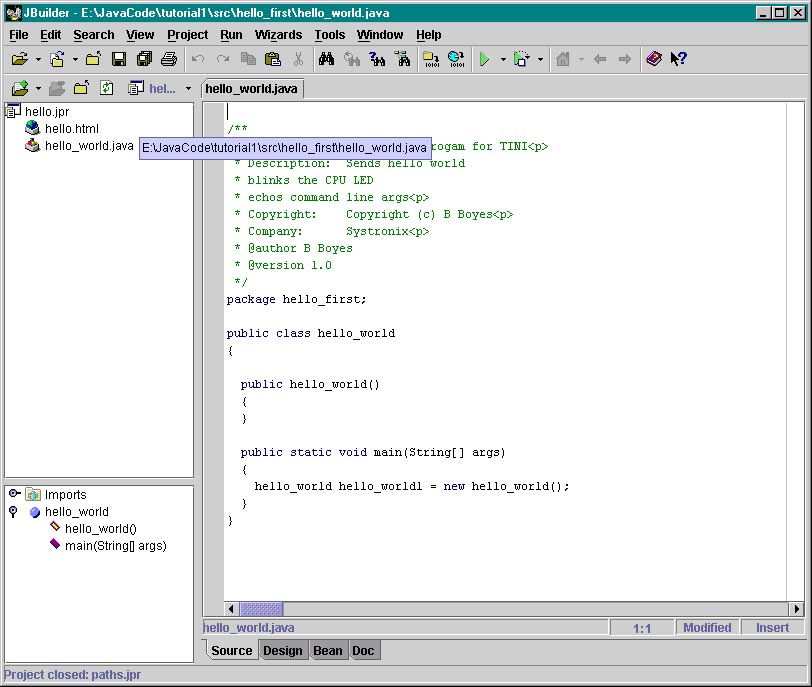
| Now JBuilder's left pane shows a new project, hello.jpr, with our hello_world.java class. If you move the cursor over the filenames in the project pane a balloon will appear and you can see that the .java file is located in a package folder which is a /src subfolder, as we saw in the previous file paths examples. |
|
Now we have our project file and class template. We need to add some common TINI packages so that we can use their classes. Do that using 'import'. Add these lines of code below our 'package' statement but before our class definition. import com.dalsemi.comm.*; Also we need to add something for the program to do. To make it a little more interesting, we'll add the action as part of our new class: // our default constructor // a method we are adding And we need to invoke this method from within the main() method of our class, so add this code below the instantiation of hello_world: hello_world hello_world1 = new hello_world(); try Now we're ready to build. In the main JBuilder toolbar, click Project->Make project. If you have no typos you'll see a "Build Succeeded" message at the bottom of the JBuilder frame. Here's a link to the complete hello_world.java file in case you want a copy of the source code as it exists on my PC. |
|
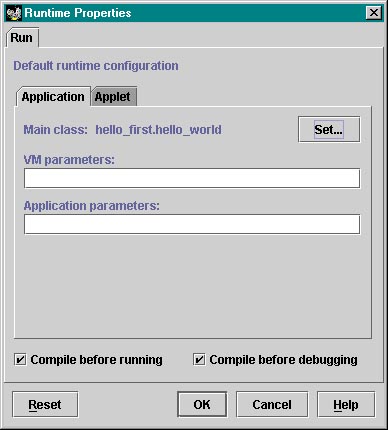
So far we haven't used anything unique to TINI in our hello_world class, so we should be able to execute it on the PC. This is one of Java's nice features. Within limits, you can run the same code on any Java-enabled platform. Let's try it. On the main JBuilder toolbar, click Run, and a 'runtime properties' dialog will open. JBuilder wants to know what we want to run (it won't make the obvious assumption that since our project has only one class it might be that class...). |
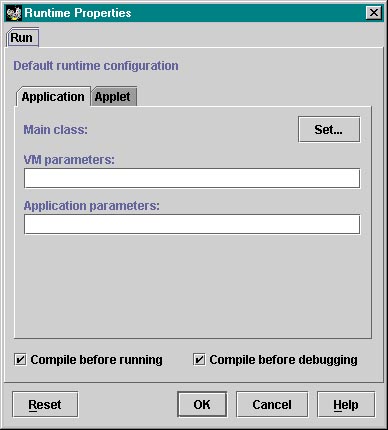
| We need to set the main class, so click the SET button and browse to our hello_world class, then click OK. For now we won't set any VM or application parameters. (Application parameters command line arguments whihc you can pass to your application.) |
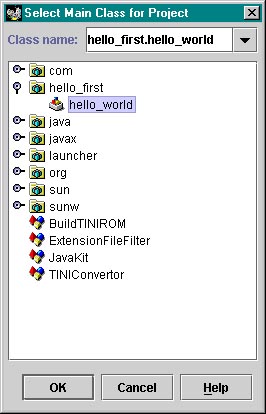
| Now our main class is set, so click OK. Your application will execute. |
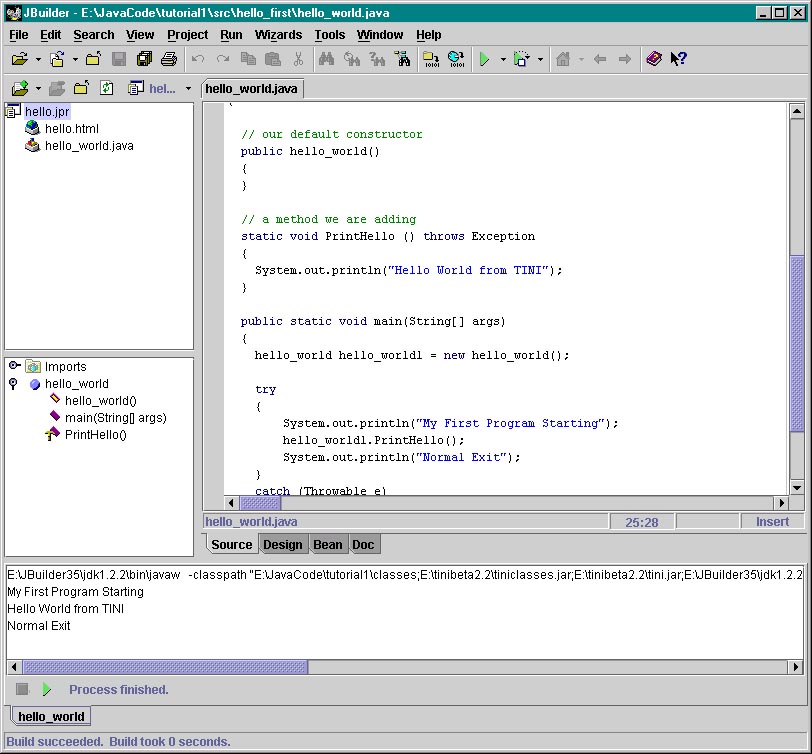
| Where's the output? Be sure JBuilder's View->Messages option is checked. You may have to enlarge the message window (I did), until you can see the output of our program. |
|
So here are the messages from our program: "My First Program Starting" from the main() method. "Hello World from TINI" from our call of the PrintHello() method. "Normal Exit" from the main method. So far so good. |
|
Now that we know it works, let's run it on TINI. First we need to create the special hello.tini file which TINI can execute. This is a special class file which TINI's JVM can process. In the project pane, right click on "hello.jpr", and select "Add to Project", then "Add File", a dialog box opens. Browse to the location of our hello_world class file, and type in the filename hello.tini. Note that the .tini file does not need the same name as our .class file, and it does need to be in the same folder as the .class file, I just find it convenient to keep it there. One caution: the Dallas conversion utility operates starting with the first class file it finds in a folder, without regard to that file's name or whether it is in the project you are intending to convert. So don't mix class files from different projects in the same folder - it will result in unreliable conversions. Click Open. |
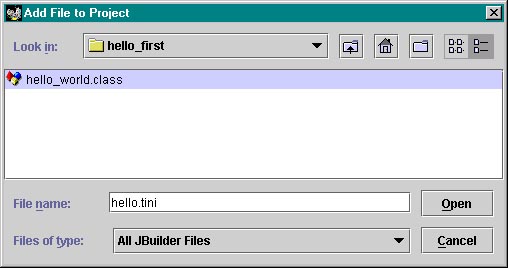
| The file doesn't exist, of course, so JBuilder asks if we want to create it. Yes, we do, so click OK. |

| Now JBuilder's project pane should show a file "hello.tini" added to our project. |
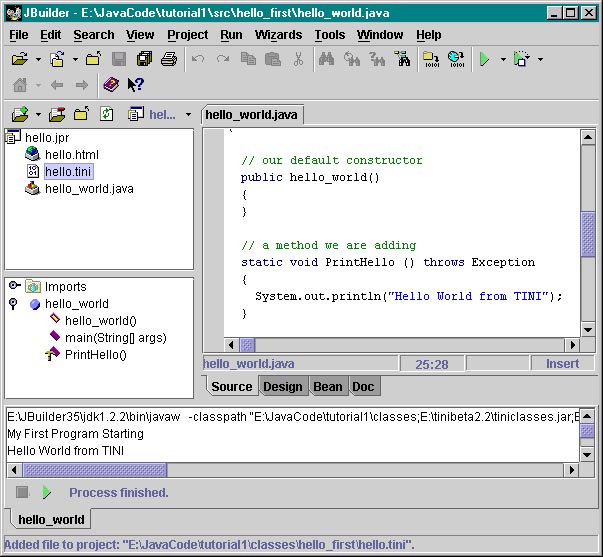
| Right click hello.tini, select Properties. In the options tab, clear the Telnet options. |
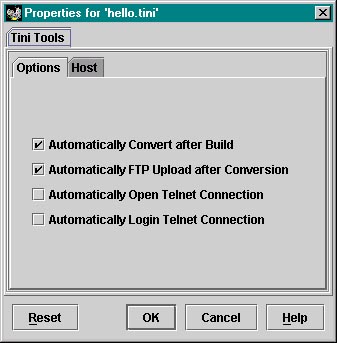
|
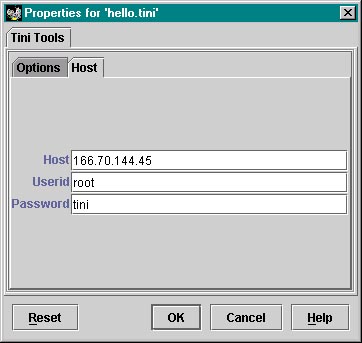
In the Host tab, set your TINI's IP address, click OK. Note: this IP address is the public TINI here at Systronix. If you don't have a TINI of your own yet and are desperate to try one, go ahead and access ours. Otherwise, be sure you enter your TINI IP address, not ours! If several people try to use our TINI for the tutorial at the same time, I'm not sure what may happen... |
|
Now TiniTools is set up for this project and it knows how and where to create the hello.tini file. There are two ways we can create the hello.tini file:
Let's do the manual conversion this time. Right click on hello.tini, then click on TINI Convert. |
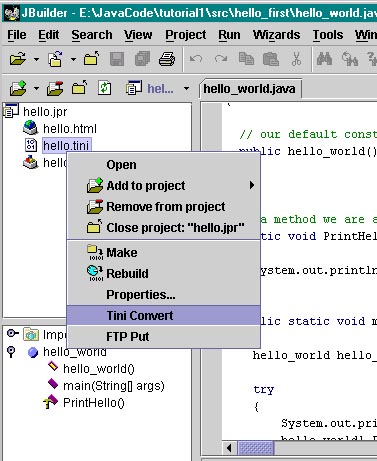
| You should see a message (JBuilder View->Messages must be checked) in a new "TINI" tab in the messsage pane at the bottom of the JBuilder window. |

| This indicates that TiniTools has successfully converted and uploaded the file. |
| Brad Clements (TiniTools author) is aware of these bugs and is working on them. The telnet support in TiniTools comes from another company, so Brad can't directly change its behavior. |
|
|
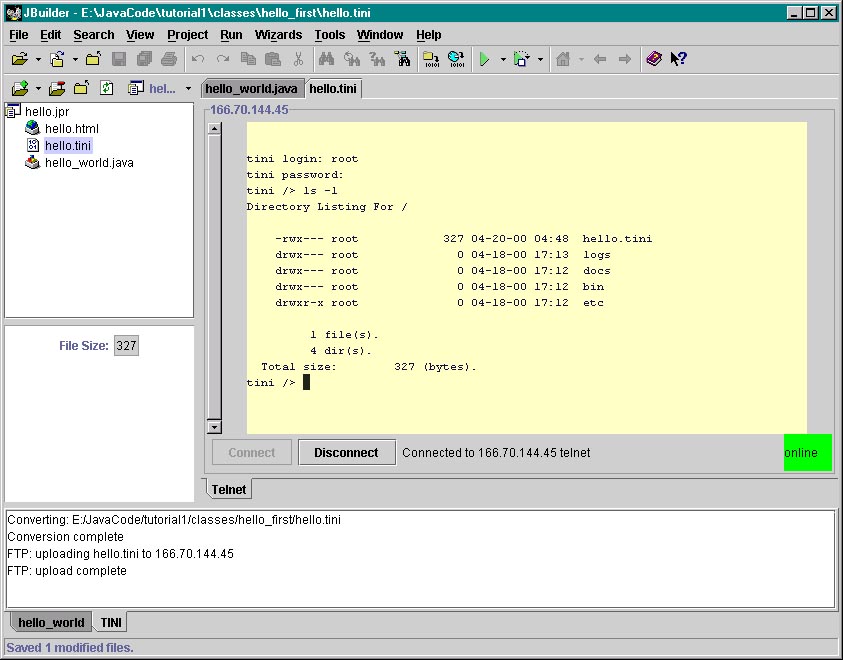
Since we turned off the TiniTools automatic telnet connection and login, we need to do that manually. Double click on the hello.tini file in the JBuilder project pane. A new "hello.tini" tab should be created in the JBuilder source pane. This is the window into the telnet connection between JBuilder and your TINI. Click on the Connect button. You may need to hit the enter key and/or resize your telnet pane to see the TINI login prompt. You should see the RX and TX lights on your tini flash briefly with every keystroke while your telnet connection is active. You're connected to "slush", the TINI command shell. You will be logged into TINI's root folder. Type "ls -l" for a detailed listing. You should see hello.tini in the root folder. Note: these screen captures were taken using the Systronix public TINI system which has other files installed and was also running TiniHttpServer. |
|
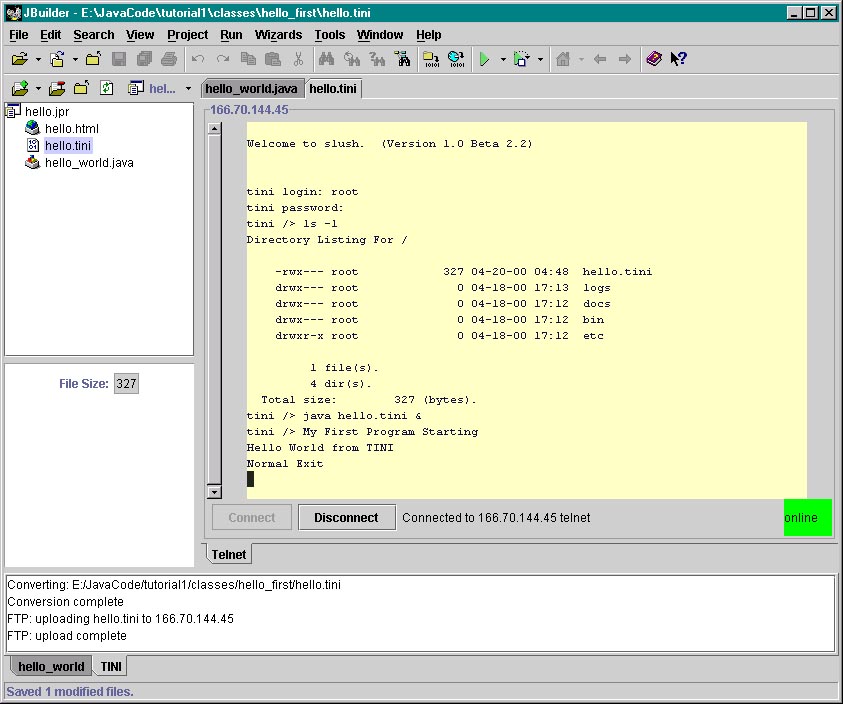
We're ready to execute hello.tini on TINI! At your telnet slush prompt, type: java hello.tini & This invokes the TINI java interpreter on our sample program. The ampersand (&) tells TINI to execute this program as a thread. This lets us still use slush commands and kill our process if a bug sends our program into an endless loop. Otherwise we'd have to reset TINI and reboot. Enter the command line above followed by the enter key, and after a brief pause you should see output similar to this: |
| Congratulations! You've written, built, downloaded and executed your first TINI program, using JBuilder and TiniTools! |
|
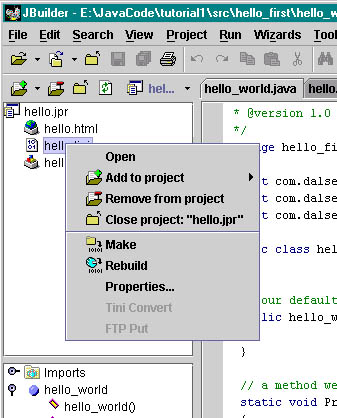
The TiniTools 'convert' and 'ftp put' commands are grayed out when they are active. For example I have auto convert and auto ftp enabled. If I do a build, it starts the convert and ftp which takes 10-15 seconds. During that time the convert and ftp put items are grayed out because they are already running. See th e image below. They can also gray out if TiniTools can't connect to TINI. Unplug your ethernet or power off TINI. Start an ftp put and the commands will be grayed out forever or until the ftp connection times out and fails. If the properties popup is open and the TiniTools options are grayed out, they will stay that way even after the cause of the grayness-causing condition is resolved. The popup doesn't refresh itself. You have to close the popup and open properties again to see if the commands are available. |
|
|
|
|