
| New January 12, 2001 - Tutorials are moving |
| All the tutorials are
now at http://www.systronix.com/tutor/top.htm (These old pages will be left for a while until all the new tutorials are complete) |
|
Note: you must have JBuilder installed to use TiniTools. JBuilder is extensible in the sense that you can create additional functionality for it, and TiniTools is one example. TiniTools was written by Brad Clements of MurkWorks. (Send him an email thanking him and maybe he'll continue to enhance it.) TiniTools are not a Dallas product and they are not included in the Dallas TINI firmware. You need to get them from MurkWorks. When you program TINI you need to perform several steps each time you want to change and run a program. Without TiniTools, or some equivalent, you could find yourself doing the following dozens of times in a day:
There has to be a better way than all this manual data entry. Script files help some but then you are constantly writing and maintaining them. TiniTools to the rescue! TiniTools makes the TINI compile -> convert -> download->test cycle easier by automating a lot of the above steps. Here's the TiniTools version of the above:
|
|
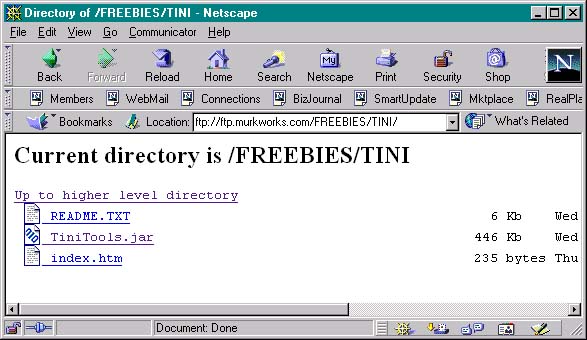
Aim your browser at ftp://ftp.murkworks.com/FREEBIES/TINI/ and download both TiniTools.jar and README.TXT, saving them in a backup folder on your computer. (Index.htm is a short page describing what the files are.) Read the readme.txt file. |
| Copy TiniTools.jar to your JBuidler lib\ext directory. In my case, this is e:\jbuilder35\lib\ext. This is the only TiniTools file to install. We're not done, yet, however. Configuring TiniTools and JBuilder to work together is the next step. |
|
If you use JBuilder, change the JBuilder35\bin\jdk.config file to refer to tini.jar. If you don't do this, TiniTools' Tini Convert will hang, waiting forever because it was not properly intialized when JBuilder started up. You need to add the line "addpath d:/tini1.0/tini.jar" as seen below, the additions are in red. # +-----------------------------------------------------+ # Use the embedded JDK
provided with JBuilder Foundation # Add JPDA and the "tools"
JAR to the path since the JDK Close and restart JBuilder after this change, since JBuilder only reads this file on startup. |
|
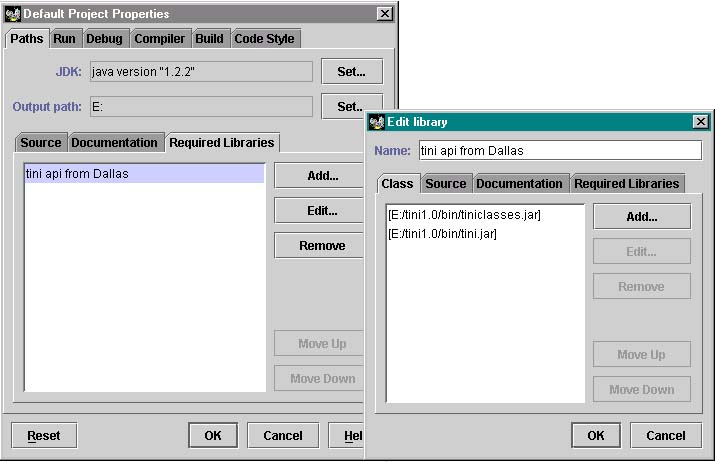
You also need to change the "required libraries" configuration in JBuilder to point to the tiniclasses.jar and tini.jar files. This is in the JBuilder Project -> Default Project Properties menu. Click Add, and give the Tini libraries some name such as "tini api from Dallas", then browse and add tiniclasses.jar and tiniapi.jar. Note: the default project properties apply only to new JBuilder projects. If you want the Tini api to be added to an existing JBuilder project, you need to follow a similar procedure but in the "Project Properties" menu. |
|
There's another gotcha with TiniTools. The first time I tried a Tini Convert with TINI 1.0, here's what happened: 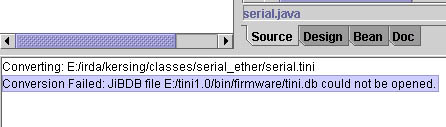 TiniTools currently is hard-coded to look for tini.db in that folder under tini1.0, so create the folder "firmware" it and copy tini.db into it. Then TINI convert should work. Be sure you copy tini.db, not move it, so that other tools which need it in the bin folder can still find it. |
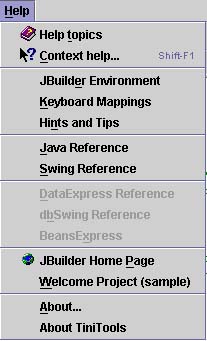
| Check that TiniTools installed OK. Start JBuilder, choose the Help menu. If you see "About TiniTools" down at the bottom, then it is installed correctly. If you do not see "About TiniTools", recheck that tinitools.jar is in the JBuilder lib\ext directory. |
| Congratulations! You've installed TiniTools correctly. There's a bit more work to be done to actually use them in a real project. For example, you need to tell TiniTools what .class file to convert to a .tini file, and your TINI's IP address for ftp and telnet. There's a separate tutorial about that: TiniTools Paths Tutorial |
|
|
|
|