JStamp Tutorials -
Start a new JBuilder Project
|
| Start JBuilder's File->New Project Wizard |
|
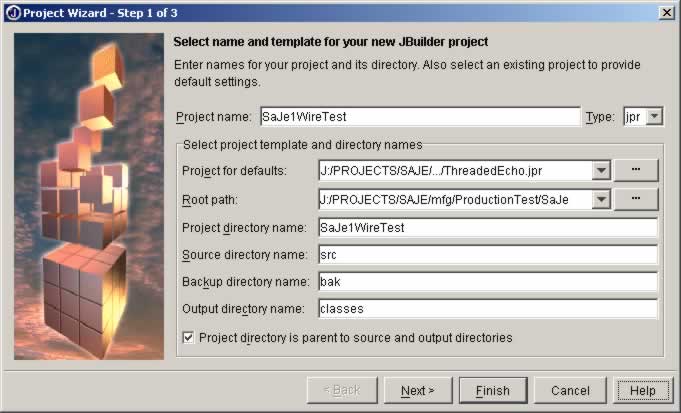
This is an example of the steps to follow to
create a new project, not an example of a specific project. This
tutorial does not create a working example program. These screen
captures are from JB4, other versions are virtually identical.
You will be presented with a total of three screens.
Please don't be confused by the fact that I am actually creating
a SaJe project here. The steps are exactly the same for JStamp,
(JBuilder doesn't care what your target hardware is, nor does it
even know). Notice that you can use an existing project's defaults
as a starting point. Even though JBuilder allows spaces in a pathname,
don't do this! Other tools and programs are not happy with
whitespace in pathnames, as anyone with Unix experience will attest.
Use underscores instead of a space or run the name together with
mixed capitalization as I have done here.
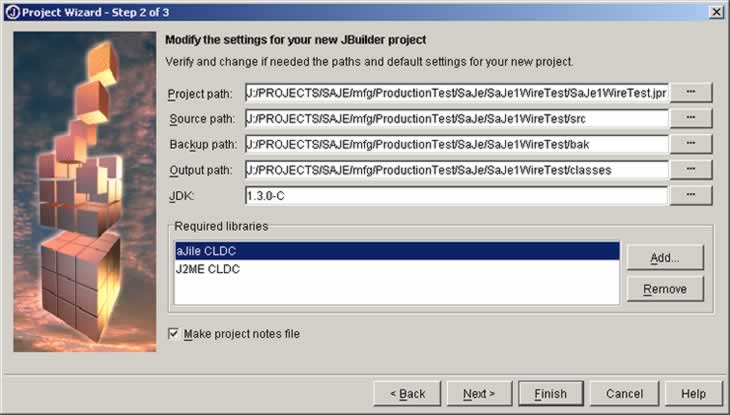
In the second step you
get a chance to review or change all the information and add required
libraries (you can also add them later, you don't have to do it
here). I like to create src, doc, classes, and bak child folders
for every project.
|
The third screen gives you a chance to enter some information.
Take pity on those who will attempt to use your code and give them a few
hints about your intentions. Click finish and you are ready to add classes
to your new project.

Use the JBuilder File->New Class menu and the class wizard
opens, with suggested class and path data. I don't use packages unless
I really need to since it just makes all the paths longer... click OK

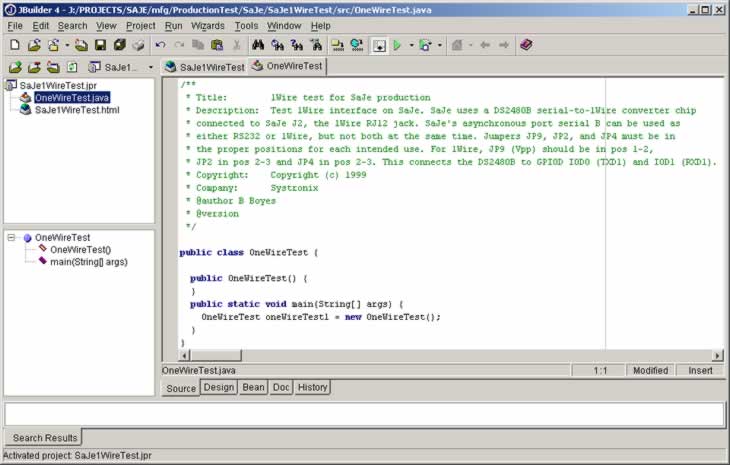
Here's the new project with a class template, ready for
your code.
Oops -- I just realized that we need the Dallas 1Wire Java
API. No problem, just use the Project->Properties menu and add a new
required library.
Later -- there are some issues with using the Dallas 1Wire
Java API on JStamp. We're working on these with Dallas but they will take
some time to resolve.
|

